Debugging a sample Hardhat Project
Quick Start
First, make sure you have hardhat installed. If you do not already, you can install it from npm:
npm install --save-dev hardhat
Then initialize a new sample Typescript hardhat project:
npx hardhat
Choose 'Create a Typescript project.'
$ npx hardhat
'888 888 888 888 888
888 888 888 888 888
888 888 888 888 888
8888888888 8888b. 888d888 .d88888 88888b. 8888b. 888888
888 888 "88b 888P" d88" 888 888 "88b "88b 888
888 888 .d888888 888 888 888 888 888 .d888888 888
888 888 888 888 888 Y88b 888 888 888 888 888 Y88b.
888 888 "Y888888 888 "Y88888 888 888 "Y888888 "Y888'
👷 Welcome to Hardhat v2.9.9 👷
? What do you want to do? …
Create a JavaScript project
❯ Create a TypeScript project
Create an empty hardhat.config.js
Quit
Next, compile it by running:
npx hardhat compile
The compiled artifacts will be saved in the artifacts/ directory by default. This directory also contains debug symbols that the solidity debugger relies upon.
Debugging Your Hardhat Project
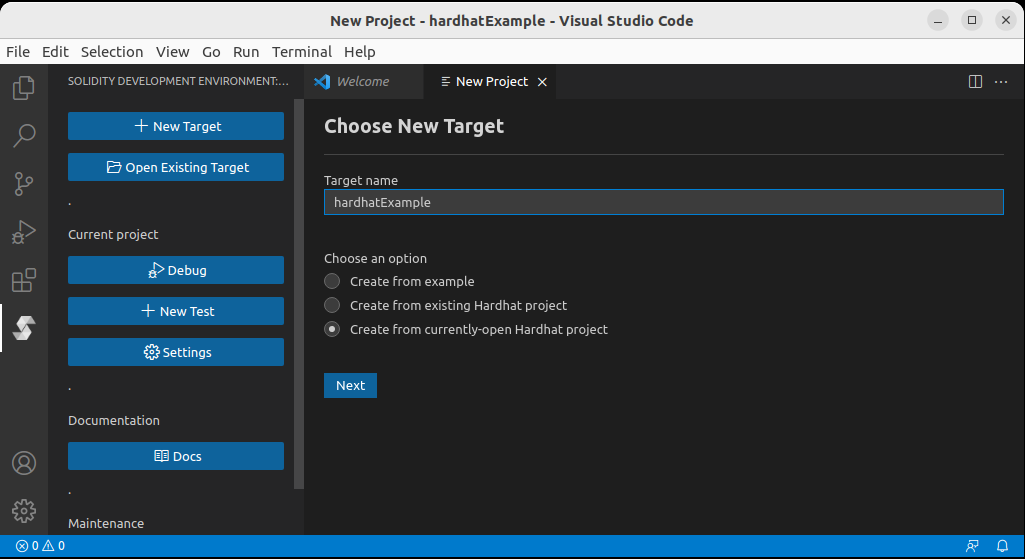
Open your project folder in Visual Studio Code, then access the Solidity Debugger menu from the left sidebar. Click on New Target and then on Create from currently-open Hardhat project. Click Next and then Create.
A Solidity Debugger Test will be created and opened:
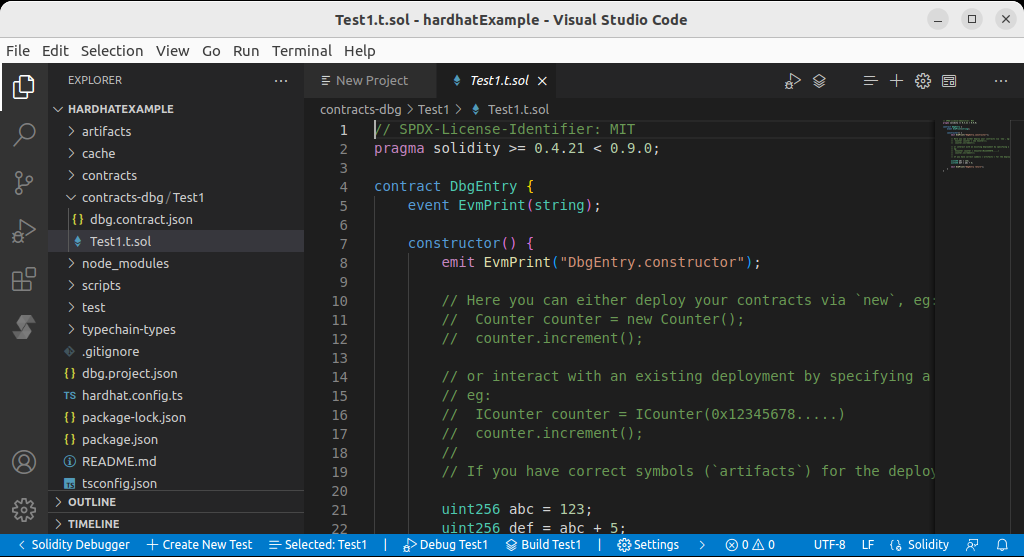
The solidity debugger is not capable of debugging contracts directly, therefore, it uses .t.sol files as entry points.
In this case, Test1.t.sol serves as the debugger's entry point. If we put a breakpoint on line 8 in Test1.t.sol and then press the Debug button we will be able to debug the test contract. However, we are actually interested in debugging Lock.sol.
One way to go about it is to import Lock.sol from Test1.t.sol and then deploy the Lock contract from inside the test.
To do this, replace the content of Test1.t.sol with the following code:
// SPDX-License-Identifier: MIT
pragma solidity >= 0.4.21 < 0.9.0;
import "contracts/Lock.sol";

contract DbgEntry {
    constructor() {
        Lock lock = new Lock(block.timestamp + 100);
    }
}
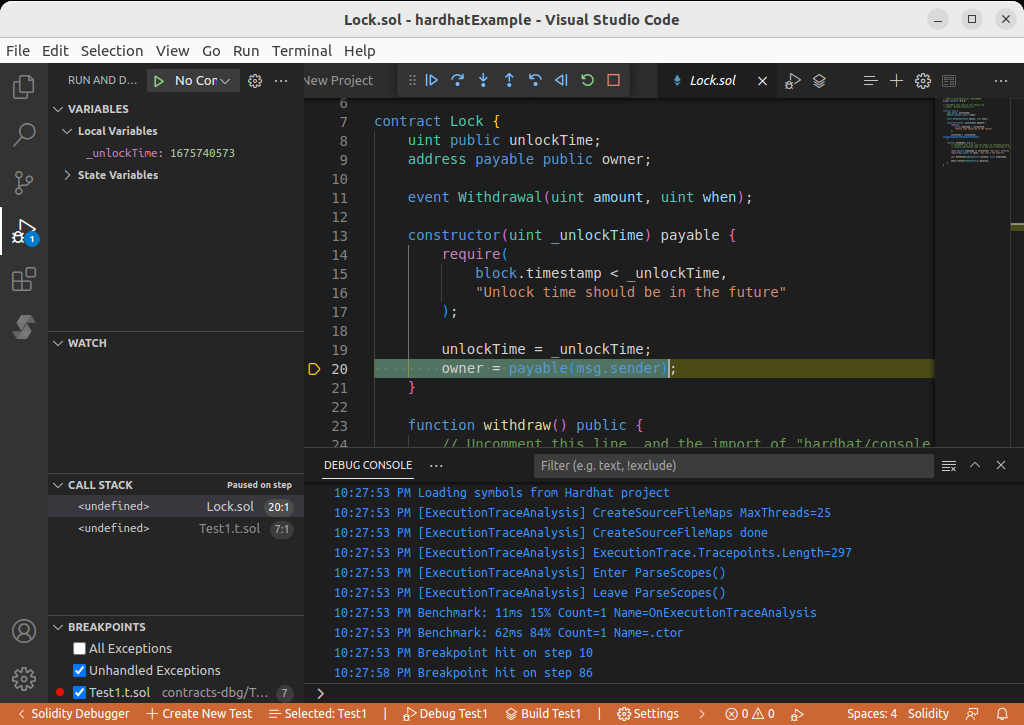
Put a breakpoint on Lock lock = new Lock(block.timestamp + 100); and click the Debug button. When the breakpoint hits, use Step Into to watch Lock.sol constructor in action:
Depositing ETH into the Lock Contract
The lock contract is meant to receive ETH and to hold it until a future time. The owner could then call withdraw() to get the ETH back from the contract. Therefore the first step in testing Lock.sol is to deposit ETH into the contract:
// SPDX-License-Identifier: MIT
pragma solidity >= 0.4.21 < 0.9.0;
import "contracts/Lock.sol";

contract DbgEntry {
    event EvmSetBalance(address, uint256);
    constructor() {
        emit EvmSetBalance(address(this), 1000);
        Lock lock = new Lock{value: 100}(block.timestamp + 100);
    }
}
EvmSetBalance is a cheat-code that instructs the debugger to change the balance of an address. We use it to change our own balance to 1000, so that we would have enough balance to make a deposit. We then deploy Lock with an initial deposit of 100.
Set a breakpoint on the line where a new Lock is created, then click Debug and use Step Into to watch the lock being initialized with a value of 100.
Withdrawing ETH from the Lock Contract
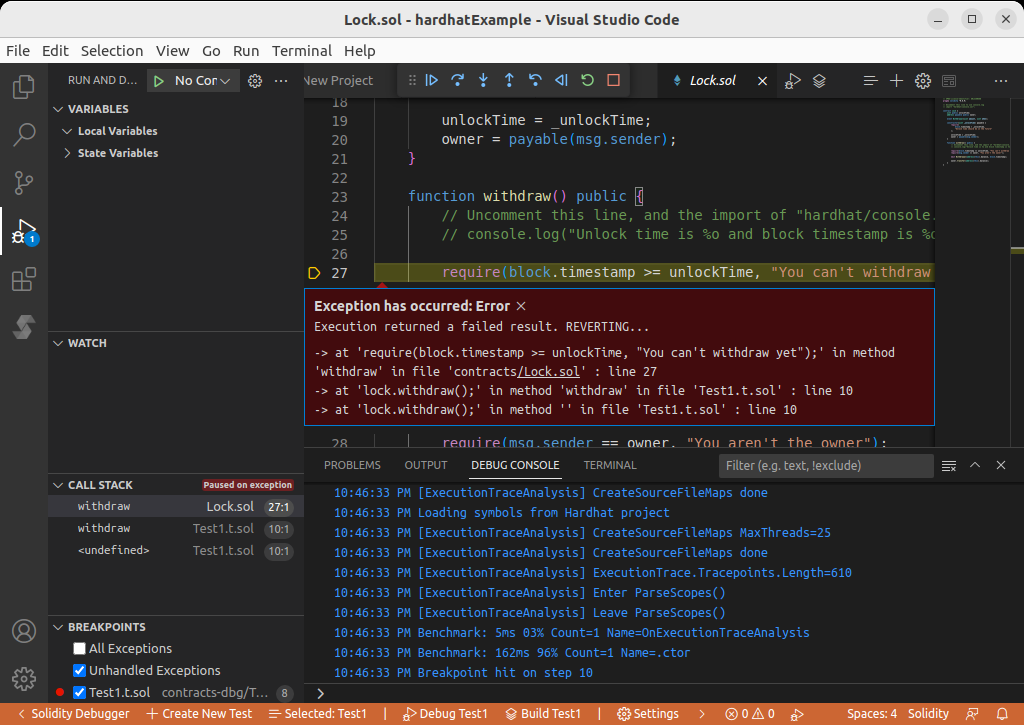
The owner of the contract can call withdraw() to get the money back. However, if we simply try calling withdraw() from our Test, our transaction would get reverted because Lock's unlock time is set to a time in the future.
Therefore, if we want withdraw() to succeed during our test, we need to somehow move block.timestamp into the future. We can do that using the EvmSetBlockTimestamp cheat code:
// SPDX-License-Identifier: MIT
pragma solidity >= 0.4.21 < 0.9.0;
import "contracts/Lock.sol";

contract DbgEntry {
    event EvmSetBalance(address, uint256);
    event EvmSetBlockTimestamp(uint256 newTimeStamp);
    event EvmPrint(string);
    event EvmPrint(address);
    event EvmPrint(uint256);
    constructor() {
        emit EvmSetBalance(address(this), 1000);
        Lock lock = new Lock{value: 100}(block.timestamp + 100);

        emit EvmSetBlockTimestamp(block.timestamp + 101);

        emit EvmPrint("Balance before:");
        emit EvmPrint(address(this).balance);

        lock.withdraw();

        emit EvmPrint("Balance after:");
        emit EvmPrint(address(this).balance);
    }
}
Now that block.timestamp is set past the unlock time, we can step into withdraw() and observe its successful completion.
